


Transmission systems from the 1970s were engineered with unique characteristics that make them favorites among automotive enthusiasts. Rebuilding such a transmission is not only a means of preserving a classic vehicle but also an opportunity for tech-savvy individuals to delve into the mechanical intricacies of older models. This guide aims to provide a comprehensive, step-by-step approach to restoring a 1970s transmission, ensuring that your vehicle remains functional and reliable for years to come.
In this step-by-step guide, you’ll gain insights into the essential processes involved in rebuilding a transmission, including disassembly, inspection, and reassembly. Each stage is crucial for ensuring the transmission operates smoothly and efficiently. With the right tools, parts, and a little technical knowledge, you can transform a worn-out transmission into a smoothly functioning component of your classic automobile.
As you embark on this rebuild journey, we will emphasize the importance of safety and precision. We will outline the tools necessary for the task and provide tips to help you overcome common challenges faced during a transmission overhaul. Whether you’re a seasoned mechanic or a novice tech enthusiast, this guide is designed to equip you with the knowledge and confidence needed to successfully restore a 1970s transmission.
Identifying Common Issues in Vintage Transmissions
When it comes to vintage transmissions, understanding the common problems is essential for a successful rebuild. Many of these issues stem from age, wear and tear, and outdated technology. Here’s a guide to help you identify and address these problems effectively.
- Fluid Leaks: Over time, seals and gaskets can deteriorate, leading to leaks. Check the transmission pan and input/output shaft seals for signs of fluid pooling.
- Shifting Problems: Hesitation, slipping, or failure to shift can indicate internal wear. Evaluate the linkage and adjust if necessary before assuming internal damage.
- Overheating: Vintage transmissions often suffer from overheating due to insufficient cooling. Inspect the cooler lines and consider upgrading to a more efficient cooling system.
- Noisy Operation: Unusual noises during operation might point to bearing issues or inadequate lubrication. Listen for grinding or whining sounds, which can indicate serious problems.
- Delayed Engagement: A delay in the engagement of gears can hint at low fluid levels or a failing clutch system. Always ensure proper fluid levels are maintained.
- Slipping Gears: If the transmission slips out of gear, it could be a sign of worn bands or clutches. Inspect these components closely during the rebuild.
Recognizing these common issues early can save time and expenses during the rebuild process. A thorough inspection and understanding of a vintage transmission’s operation will help you preserve its functionality and performance.
Utilizing modern tech tools for diagnostics can further simplify the identification process. Take advantage of advanced fluid analysis kits or diagnostic scanners to enhance your understanding of the transmission’s condition.
By familiarizing yourself with these potential problems, you’ll be better equipped to tackle your vintage transmission rebuild with confidence and precision.
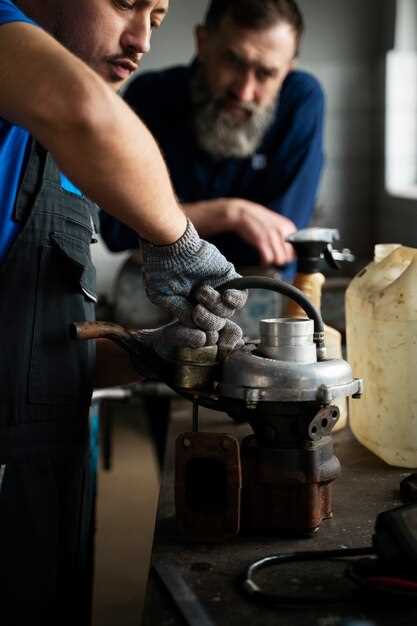
Disassembling the Transmission: Tools and Techniques
Disassembling a vintage transmission, particularly from the 1970s, requires a combination of the right tools and specific techniques to ensure a smooth process. The following tools are essential for this task:
1. Socket Set: A comprehensive socket set is vital for loosening and removing various bolts that secure the transmission assembly. Ensure that you have both metric and standard sizes, as older models may use a mix of both systems.
2. Torque Wrench: When disassembling and later reassembling the transmission, a torque wrench will help you apply the correct amount of force to each bolt. This is crucial for maintaining the integrity of your vintage transmission.
3. Screwdrivers: A set of flathead and Phillips screwdrivers in various sizes will be necessary for accessing different components and removing screws. Some vintage transmissions may also have specialty fasteners requiring unique screwdrivers.
4. Pliers: Needle-nose pliers can be particularly useful for handling small clips and retaining rings found within the transmission. Regular and locking pliers can assist in gripping and pulling components apart without damage.
5. Gasket Scraper: After disassembly, cleaning the surfaces of the transmission is important. A gasket scraper will help remove old gasket material without scratching the metal surfaces.
6. Shop Manual: Referencing a specific shop manual for your vintage model is imperative. It provides detailed diagrams and instructions, ensuring that you understand the structure and order of disassembly.
Techniques for disassembling the transmission effectively include:
1. Preparation: Before diving into disassembly, gather all your tools and create a clean workspace. Label components and bolts as you remove them to ease the reassembly process.
2. Systematic Approach: Work section by section; avoid haphazardly removing bolts. This approach minimizes the risk of losing parts and simplifies troubleshooting if components are damaged or assembled incorrectly.
3. Documentation: Take photos or make notes during the disassembly. Documenting the orientation and placement of parts will aid in the reassembly stage, ensuring that everything goes back together correctly.
4. Use of Force: Avoid excessive force when trying to separate components. If parts are stuck, apply penetrating oil and let it sit. Patience is key to avoiding damage to vintage components.
By utilizing the right tools and following systematic techniques, you can efficiently disassemble a vintage transmission, preparing it for inspection, cleaning, and eventual reassembly.
Reassembly and Testing After the Rebuild
Reassembly of the transmission involves carefully reversing the disassembly process while ensuring all components are properly aligned and secured. Begin by placing the rebuilt parts on a clean and organized workspace. This ensures that every piece can be easily accessed and reduces the risk of losing small components.
Step 1: Start with the transmission case. Make sure it is clean, free from any debris, and all gaskets are replaced. Carefully position the rebuilt internal components, including the gear sets and clutches, back into the case. Apply lubrication to the parts as needed to facilitate smooth operation.
Step 2: After positioning the internal components, ensure that all bolts and screws are torqued to the manufacturer’s specifications. This is crucial for maintaining the integrity of the rebuild.
Step 3: Once the internal assembly is complete, attach the external components such as the valve body, oil pan, and any sensors that may have been removed during disassembly. Double-check all connections to avoid leaks or malfunctions.
Testing: After successful reassembly, it is vital to test the transmission before reinstalling it in the vehicle. Connect the transmission to an appropriate test stand if available. This allows for comprehensive testing of shifting patterns and fluid pressures under various conditions.
Begin with a visual inspection to ensure there are no leaks. Run the unit through its operational modes, checking for abnormal noises or irregular shifting behavior. Use diagnostic tools to monitor fluid temperature and line pressures. If any discrepancies are noted, it may be necessary to revisit the assembly and make adjustments.
Once testing confirms proper operation, the rebuilt transmission can be installed back into the vehicle. Ensure that all connections are secure and follow the manufacturer’s guidelines for installation procedures.
A successful rebuild of a 1970s transmission not only enhances performance but also extends its lifespan. Following these reassembly and testing steps will ensure that your efforts yield a reliable and efficient transmission.


