


For many car enthusiasts and owners of older vehicles, the maintenance of cooling systems remains a crucial aspect of ensuring longevity and performance. One of the primary components in this system is the radiator, which plays a vital role in regulating engine temperature. Over time, radiators can become corroded, clogged, or otherwise compromised, leading to overheating and potential engine damage. Regular maintenance checks can prevent costly repairs and extend the lifespan of your classic car.
When it comes to maintaining a radiator, it’s essential to conduct routine inspections. Owners should check the coolant levels, looking for any signs of leaks or discoloration that could indicate issues within the cooling system. Additionally, flushing the radiator periodically not only removes sediment buildup but also helps in maintaining optimal cooling efficiency. By being proactive in these maintenance practices, you can mitigate risks associated with engine overheating, ultimately providing a smoother and more reliable driving experience.
Diagnosing Common Coolant Issues in Classic Cars
Maintaining the cooling system in classic cars is essential to ensure their longevity and performance. Over time, coolant issues can arise, leading to overheating and potential engine damage. Recognizing the symptoms early can save time and money.
One of the most common coolant issues is leaks. Inspect the radiator for any visible signs of coolant leakage, such as puddles under the vehicle or wet spots around hoses and connections. A cracked radiator or loose clamps can contribute to these leaks, so thorough examination is crucial.
Another issue often encountered is coolant degradation. Over time, coolant can become contaminated with rust and debris, affecting its ability to transfer heat. Regularly check the color and clarity of the coolant in the radiator. Fresh coolant is typically bright and clear, while degraded fluid may appear rusty or cloudy. Flushing the system can help restore efficiency.
Air pockets in the cooling system can lead to hotspots, causing overheating. If your classic car’s temperature gauge spikes unexpectedly, it may indicate the presence of air pockets. Bleeding the cooling system can eliminate trapped air, ensuring proper coolant flow throughout the radiator and engine.
Thermostat failure is another common issue. If the engine remains cold or overheats despite sufficient coolant levels, the thermostat may be stuck closed or open. Testing the thermostat’s functionality and replacing it if necessary will help maintain proper engine temperatures.
Finally, check for signs of corrosion in the radiator and other components. Corrosion can lead to blockages and inefficient cooling. Regular inspections for rust and scaling, along with periodic system cleaning, can prevent these problems from escalating.
Proactively diagnosing coolant issues in classic cars is essential for preserving their value and reliability. Regular maintenance and attention to detail can help ensure that the cooling system operates efficiently, allowing classic vehicles to perform at their best.
Step-by-Step Guide to Inspecting Your Radiator
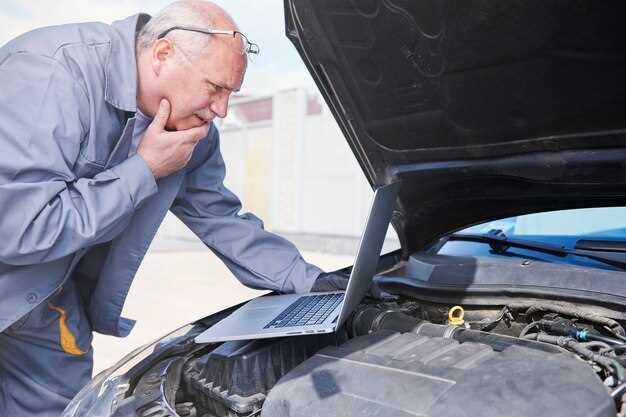
Inspecting your radiator is essential for ensuring the efficiency of your vehicle’s cooling system. Follow these steps to conduct a thorough inspection:
1. Gather Necessary Tools: Before you begin, collect the tools you’ll need, including a flashlight, coolant (if necessary), a funnel, and a wrench for hose clamps.
2. Ensure Safety: Allow your vehicle to cool down completely before starting the inspection. Hot coolant can cause severe burns. Wear gloves for extra protection.
3. Check for Leaks: Inspect the radiator for any visible leaks. Look for spots or stains around the radiator body and hoses, which indicate coolant escaping. If you find a leak, it may require repair or replacement.
4. Assess the Coolant Level: Open the radiator cap (only when the engine is cool) and check the coolant level. It should be between the “low” and “full” markers. If it’s low, top it off with the appropriate coolant mixture.
5. Examine the Condition of the Coolant: The coolant should be clean and bright. If it appears rusty or has debris floating in it, consider flushing the radiator and replacing the coolant.
6. Inspect the Radiator Hoses: Examine all hoses connected to the radiator. Look for cracks, soft spots, or bulges that could indicate wear. Replace any damaged hoses to prevent leaks.
7. Check for Obstructions: Clear any debris, such as leaves or dirt, that may block the radiator fins. This ensures optimal airflow and cooling efficiency.
8. Test the Radiator Cap: A faulty radiator cap can lead to coolant loss. Inspect the cap for wear and ensure it seals properly. Replace it if necessary.
9. Evaluate Temperature Gauge: After conducting the inspection and putting everything back together, monitor your vehicle’s temperature gauge while driving. If it consistently runs hotter than normal, further investigation may be needed.
10. Regular Maintenance: Make it a habit to inspect your radiator regularly, especially as your vehicle ages. This proactive approach will help prevent overheating and extend the life of your engine.
Choosing the Right Coolant for Vintage Engines
Selecting the appropriate coolant for vintage engines is essential for maintaining optimal performance and preventing overheating. Older vehicles often have unique requirements due to different materials and designs used in their cooling systems.
First, consider the composition of the coolant. Vintage engines typically benefit from classic green ethylene glycol-based coolants, which provide excellent corrosion protection for older radiator metals such as copper and brass. Some newer formulations may contain additives that can negatively affect these materials.
Additionally, it is crucial to check the coolant properties, including pH balance and freeze protection level. The ideal coolant should have a pH level between 7.0 and 8.5 to avoid causing damage to the engine’s internal components.
Another factor to keep in mind is the coolant’s compatibility with coolant hoses and gaskets commonly found in vintage vehicles. Using a coolant that is too harsh or contains certain chemicals can lead to deterioration of these components, resulting in leaks and potential engine damage.
Lastly, when maintaining the radiator, always perform regular checks to ensure the coolant remains at the appropriate level and condition. Flush the system periodically to remove any buildup of sediment or rust that may compromise the efficiency of the cooling system.
By choosing the right coolant and ensuring the system is well-maintained, you can help extend the life of your vintage engine and keep it running smoothly for years to come.


